Saturday, February 27, 2021

Year 21, Week 06, Day One (week 1100) 02-20-21 Saturday

  Year 21, Week 06, Day One (week 1100) 

 (January 17, 2000 was my first carving day.)

02-20-21 Saturday

 60 early morning, around 66 when I finally got out back, 72 as the high.  Clouds came and went, mostly broken clouds with lots of sun. They moved fast  really strong winds gusts blowing sand paper and silk flowers off the table, especially in the morning.  This weather report is brought to you by The City Of Pompano Beach Department Of Tourism. 

During the week, I stopped at a couple Dollar stores and picked up some white flowers. I love Daffodils so I picked up a couple different types of them at each store while I was at it. At one of them, it was usually the best stocked store with some really good stuff. It was really picked over this time. I got third in line behind a woman who was buying several dozens of soaps, shampoos, conditioners, deodorants, tooth paste, etc. Her bill came up to $230. My original thought was she had a school or something like that. Someone else I had talked to suggested that she was reselling them.  Hours later, it dawned on me that she might be buying them to either send to the islands, or even to send them to Texas. It took some time to scan all that stuff, and there was only one line opened.

The other one was just freshly stocked and had everything I would need, especially flowers and the flower foam. 

I keep some supplies in a basket that I am allowed to keep in the house. Last week, I had heard a crack and saw a piece come off the wheel as I pushed it into place. Today I started pulling on the basket and the wheel came off. The plastic spokes broke off the hub. I carried and dragged it out back. I had a basket in my truck I picked up at a recent yard sale. I had only used that basket twice to carry groceries into the house. 

I swapped the stuff between baskets. Wood working magazines with projects I might do, dozens of bottles of acrylic paint, ornament wood projects that were not done, wood for other little projects, materials for aluminum flowers I did late last year that I want to try again on, wooden dowels and skewers of various sizes that I decided I did not need to leave with my carving basket. That stuff adds up eventually to some weight. 

Now I have another project I might or might not do. I could make new wheels for the basket out of wood. If I make it the size to fit the tires, I would have to heat the tires to make them pliable to stretch into place. I learned that a long time ago when I tried to make wood wheels for a wagon. At that time, there was a lot I did not understand about what I was doing and I never mounted the tire on it, nor did I put the wheel on the wagon. 

This morning, my first project was to lay out all my flowers and photograph them. I needed to see what I had and wanted to show them. I then took out the googly eyes package I got and laid them all out for pictures. I put them in a different bag that would close tightly, and the rest of the day I was finding them on the ground everywhere. How they got there, I have no idea. 

I had picked up some buttons a while back with the idea of using them for eyes. The large “back loop” buttons were even too small. They are brown and have a lighter ring around the center, making them look like eyes. I made some duck and chicken bowls and used these buttons for the eyes. They added a bit of lifeto them. 

I had gotten some big round buttons with the idea of shaping them for the nose. They were not quite right for eyes or nose. I could paint the pupils and such on them, but the large googly eyes will work as well.  

While sitting outside working, I heard my first mocking bird for the year. Using different kinds of chirps They do other sounds too), it sang for about five minutes and then left. They may well be around all the time, but I am never outside to hear them. Those are my most favorite birds. I even like their greyish coloring with the white patches on their wings. I have never been impressed with brightly colored birds. The one’s color I like best is the palm Warbler. It is brown with tan spots. As it moves around, it flicks the tail. 

I took down the Valentine’s Day ornaments from the tree. I have not decided whether to throw the tree out. If I do, I will remove the red bows and then put it out for trash removal. I will do that on trash day.  I had more crochet hearts than I expected. Most are doubled layered with white edging, but one pair are single layered, just bare pink yarn. I should stitch those together like the others.  Of course, I had the red hearts with white hearts in the center, and the Camphor hearts with pink edging. I also had some chains with heart shaped beads and paper lace hearts. With all those added to the tin that has my crochet ornaments, I have two popcorn tins of ornaments. I need to letter on them in white what they are. 


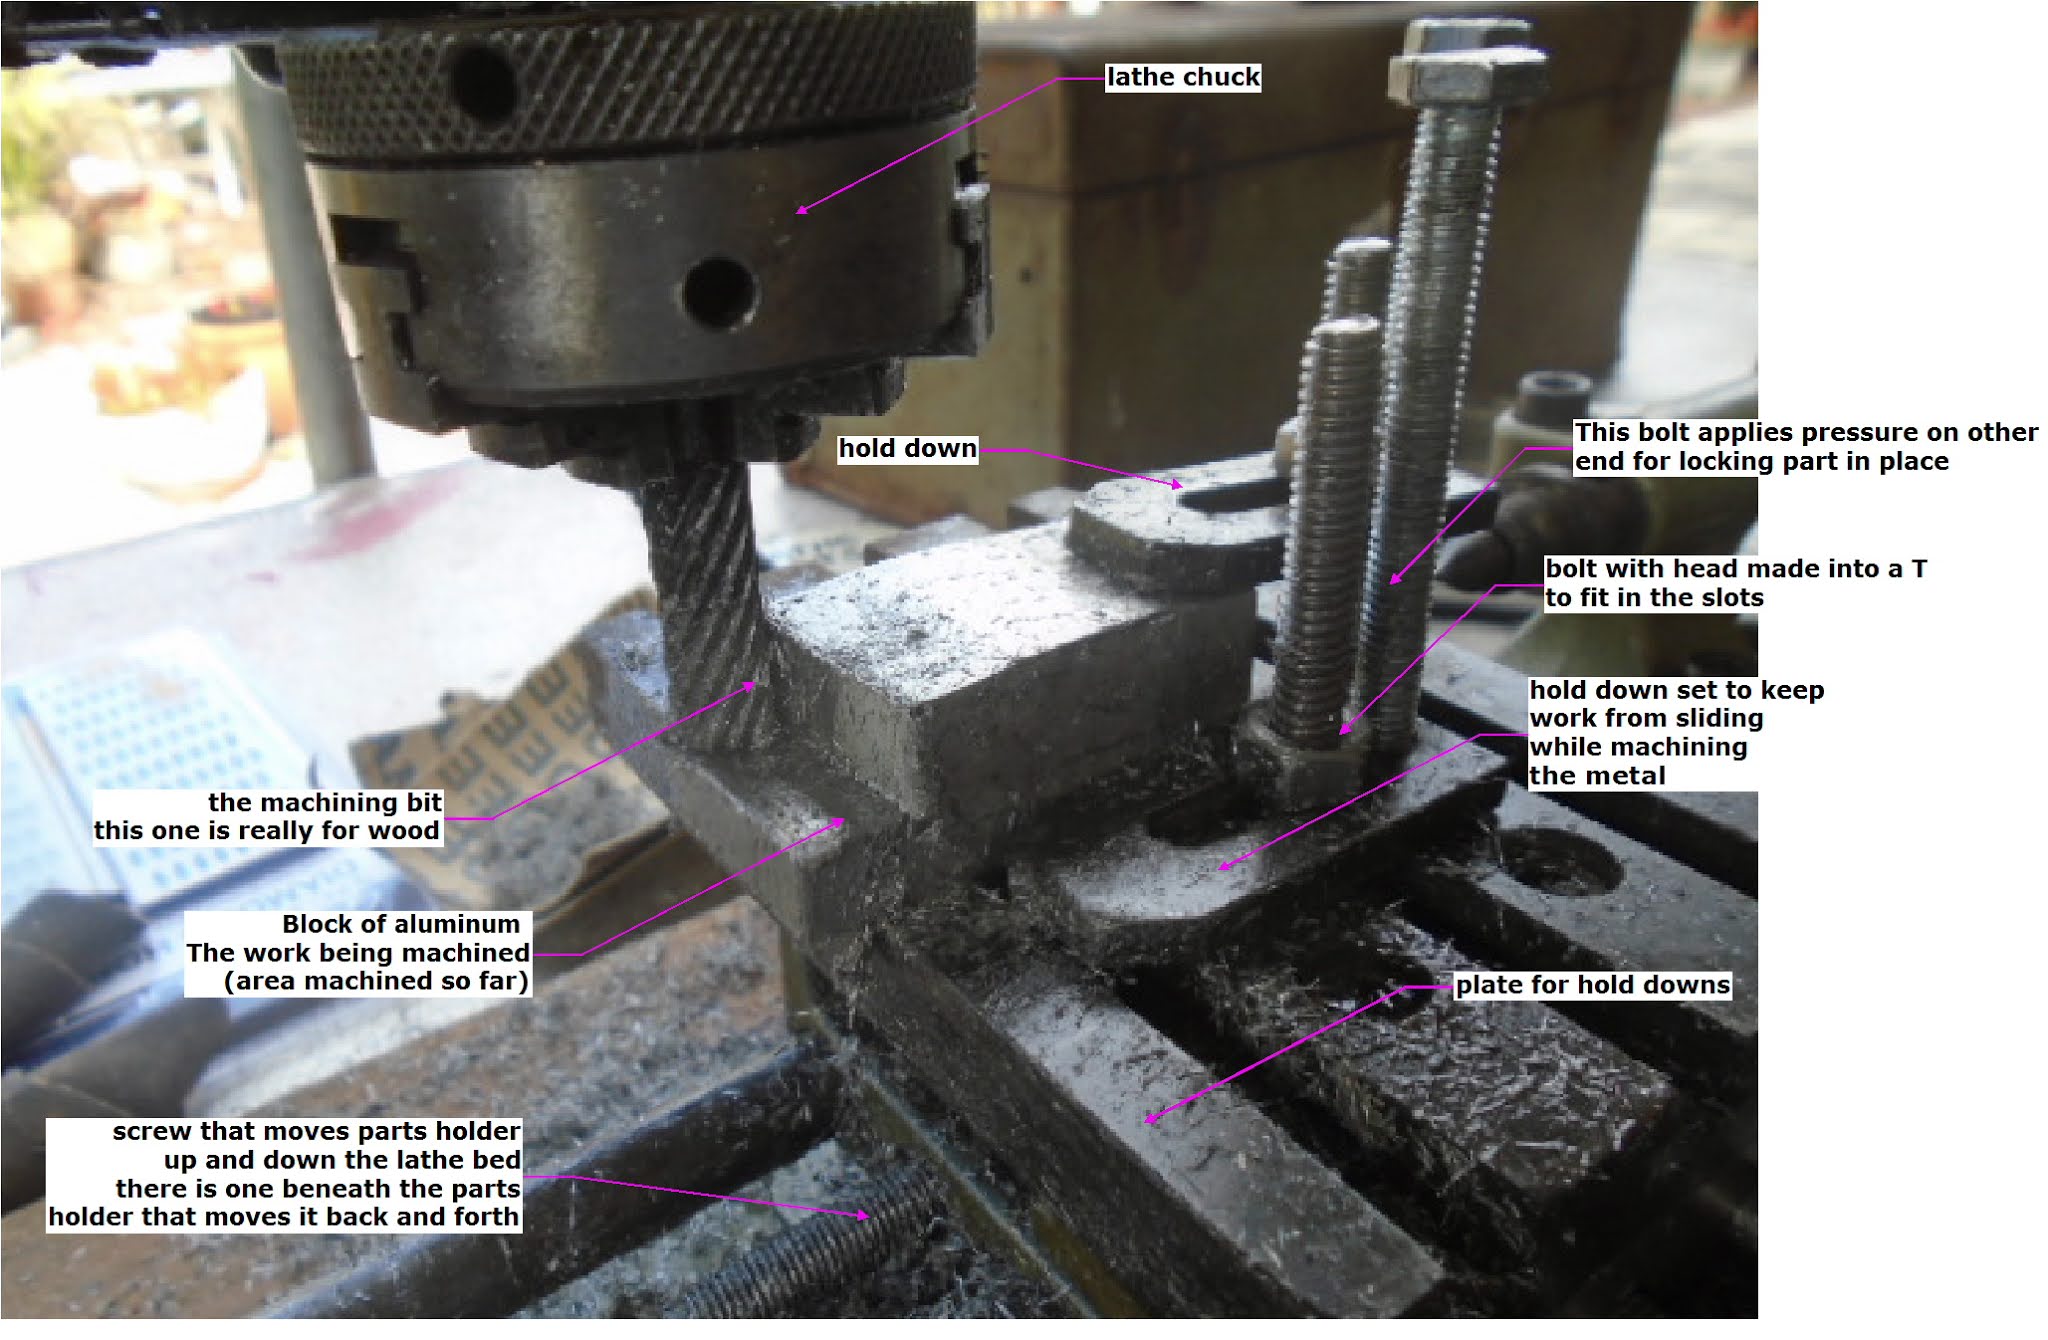
I have a pair of scissors that one of the handles broke on me. I quickly found that the metal is better than my good drill bits. I was going to make a wooden handle replacement but needed to be able to screw it in place. No hole, that idea was gone. I then decided to make them into knives. One had a handle that was fairly straight to the blade, the other handle took a strong angle. Checking and marking several times, I put the angled blade into the vice and pounded it to the side with a hammer. I adjusted it and used the claw of the hammer to bend it the other way. It broke. I then took both of them to the grinder and removed the scissor edge, and then shaped the handle end. The one with the angle needs more shaping to fit right in a handle. I likely will make it even shorter than it is now. I would grind a little bit on one, set it to the side, grind on the other one, set it to the side. I decided to start grinding the sides on an angle and used a pair of plyers. It was not really the right way to do it as it would rotate down in the jaws. After little bit, I decided to stop for now. I will do more later. I do have a start.  I need to work smarter on this. The tool rests are garbage and unuseable so I was holding them by hand. That is not the way to do it. 

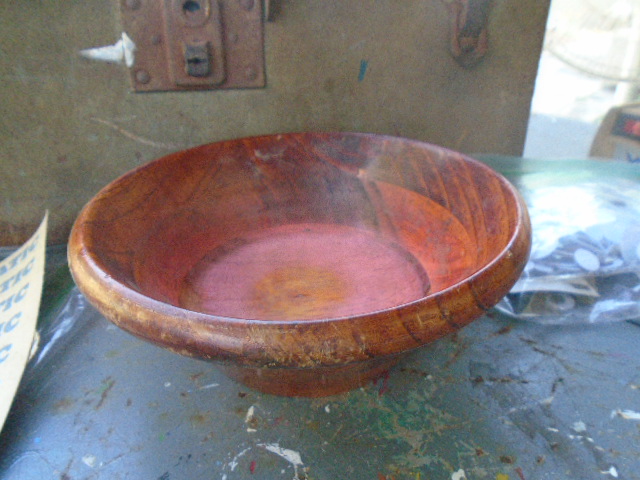
One bowl I received back from my boss was a bowl I made in 2008. I had made it on a face plate. The bottom stand was mostly square but the corners had a slight round. The bottom was the natural wood surface, not really sanded. The outside of the bowl followed the inside, then flared out for the bottom stand. 

I decided I was going to fix it. I found the center of the bottom and stuck the mouth of the bowl over the sanding disk I have on there. I cut down the bottom and continued the taper. I then made a new foot, a lot closer to the bowl. The wood, mahogany was fighting me a little as I made a ring on the bottom and it kept chipping. I got it done, with one tiny chip. I also cleaned the outer surface of the bowl. I could see that cracks had formed in the bowl.

I turned it around, the bottom in the jaws of the chuck, a ring style replaceable point in the tail stock and let it self center itself. I started cutting on the inside and I found that the bowl had warped into an oval. That told me that I would have to use more manual methods of cleaning it up. I was not sure if there was enough wood to cut away the oval to make it round again.

I sat down at the table and used the dremel with a really course sanding paper on a sanding bit I had modified to fit the dremel. I knew it would do a lot of damage but it was worth it to get the varnish off. Varnish takes some effort and time to remove. I got the worst of the varnish off, both inside and out. Then I took 80 grit sandpaper and just sat and rubbed the surfaces, removing varnish traces and scores from the power tool. When I had it about right, I glued the cracks back together and, because I could not find the large clamps (found them later in a box) I used a nylon strap to hold it together. A bit later I used the glue to fill some cracks and re-glue the joints. I set it to the side. 

I sanded some more on the apples from last week. I had some spots that needed work. I also sanded more on the bowl I started cleaning up last week. 

I then took a banana bowl I had made, where I used power to sand it and then varnished it. It was really ugly. I used power again to remove the varnish and clean it up. Then I hand sanded it. I did not get it completely sanded the way it is supposed to, but it was much better than it was. 

I think I mentioned last week that I hate sanding. I am not sure why I am sanding rather than making things. I did not get past 80 grit today.  I will go to finer sanding grits next time. The biggest problem with sanding, is that you have to sand it as much as 5 times. You have to sand it with each higher sanding grits. I was using 80 grit today. I then have to use 100 grit, then 220 grit, then 350 grit, and then 400 grit. To sand something, you are committed to do a lot of sanding, and each step shows things you missed the sanding before and many times I have had to re-sand something at 100 grit that I was already working at 400 grit on because the stuff missed was so bad. I am being more careful with my sanding but still not up to where I should be. 

I finally packed up, and after spending some time with Mom, I headed home. 

I will see what I do tomorrow.

Year 21, Week 06, Day two (week 1100) 

 (January 17, 2000 was my first carving day.)

02-21-21 Sunday (nice date)

68 very early in the morning, 75 which was the high when I got outside. The strong wind moved sandpaper and all the trees were waving at me. There were lots of cotton puffs, thin enough to not really block the sun when they went in front of it early on. Later in the day, the clouds matured and over-ate, so they started blocking the sun with just a little bit of blue between them. The state got their act together and fixed the clouds so it was no longer broken, though they were made up of a lot of glued-together puffs. This weather report is brought to you by The City Of Pompano Beach Department Of Tourism. 

After gassing up and stopping to pick up some groceries, I got to Mom’s house and set up for sanding again. I needed some more grits to work with and while digging in the shed, I found some 40 grit sandpaper!!! Wow, I needed that. I have used 32 grit before. There was some work that really needed some wood removal to get it right. 

Several years ago, I ordered a box of sandpaper from a company. They sold sandpaper for belt sanding machines and these were cut-offs. They packed it with a wide variety of sanding grits. This 40 grit sandpaper was from that shipment.  I got several other grits I needed too. 

A tea pot my boss gave me needed some light finishing as it was scuffed. I sanded it with 400 grit sandpaper, finding varnish blobs and stuff and spent a lot of time getting it cleaned up. When I decided it was done well enough, I was going to varnish it. I wanted to do a rub-out finish, but needed liquid varnish, not spray. I consolidated some spray cans into one box and found a can of varnish I was excited. The best finish I had ever gotten was a rub-out finish. 

I dug out some disposable rags I have and after folding it into a pad, I dipped it into the varnish and started rubbing all the surfaces of the vase with the varnish. You keep rubbing the varnish until it becomes dry. There are no drips, no blobs, the surface is not a high gloss finish but comes out smooth and clean. You are supposed to wear gloves when you do this as the chemicals in the varnish might enter your body through the skin, and it leaves a difficult to remove mess on your hands. I did not have gloves on hand. I did not think of them until much later.  The varnish left black on my hands that take some effort to rub off.

I had sanded the apples, both bowls to a finer finish. I remembered one of the other tea pots I had, had a rough finish. I dug that out and sanded that with 400 grit sandpaper, showing my brother what it felt like before and after I sanded it with 400 grit.  While talking to my brother I demonstrated a rub-out finish on the tea pot. I then added varnish to both bowls and both apples. They were not sanded fine enough, and the bowl I had modified has glue marks on the surface that I did not remove. I set them out to cure. The tea pots looked better than they did. They will need a few more coats. Everything else will need more sanding and cleaning. 

I had all different grades of sand paper in different shapes, and each had a different curl. I combined them into one roll and stuck them nicely in my carving basket.


I love flavored coffees. One coffee I like is what I call a Cuban Dark coffee. It is a super dark roasted coffee that is finely ground. You can use it for espresso. I brew it like regular coffee for the most part. The bags they come in is a stiffer plastic, packed like a brick. I usually have to stick it into a zipper bag as there is no way to close it properly. I dug out a small coffee can and cleaned it inside and out, sanding the outside and scraping glue off. 

I then hit it with a coat of white paint. After the paint had set, I took some brown acrylic paint and wrote “Cuban Dark” on the outside. It was so ugly, I took a wet rag and removed the worst of the lettering, and then gave the can another coat of paint. Once the paint set again, I used a marker to write “Cuban Dark” on it. That was better. I have to wash it really good and then let it dry before putting the Cuban Dark coffee in it so I can scoop out of it and close it up nicely. 

I will have to see what I work on next week.

2695


The results of my Sunday work

Stuffy and "lace" placemats that were on the tree

on top are camphor hearts. 
second row painted hearts.
bottom row crochet hearts.
heart shaped bead necklaces 
sanded apples

sanded bowl


dollar store flowers. yellow ones on top are daffodils 

foam and craft  store flowers

Three sizes of googly eyes. 
Buttons in back

eye buttons

close up of large buttons t o show the eye look.

A bowl I made back in 2008 About to remove the base. 


disassembled scissors. making them into knives

The bowl above after I sanded it and then had to repair it.

bowl above with new base. 


Saturday, February 20, 2021

Year 21, Week 05, Day One (week 1099) 02-13-21 Saturday

  Year 21, Week 05, Day One (week 1099) 

 (January 17, 2000 was my first carving day.)

02-13-21 Saturday

76 degrees as the low, 82 as the high. Humidity in the 70s, but the brisk breeze kept it nice. There is a front sawing across the state to the north. Very early morning, it looked like blobs from it were heading our way. By the time I got out back to work the threats of liquid sunshine was gone. We had broken clouds in the morning and blue skies with clouds now and then during the day. Nothing like predicted.  This weather report is brought to you by The City Of Pompano Beach Department Of Tourism. 

Tomorrow is Valentine’s day. I decided to work on the puppy bouquet. I have never made one and was working from memory. There was a lot I did not know. Some I figured out by the time I was done. 

I already had a small pail that had a citronella candle in it. Mom had already roughed cleaned it out.  A few weeks ago I had cleaned it up more, scraping it, scrubbing it. Today, I decided to look again at Mom’s collection of pails again. In the very back of the cubby hole they were in was a pail painted blue. It really needed to be repainted, but I decided to use it as it was. I washed both pails in super hot water and soap, scrubbing them and then brought them out back and let them dry some. The first pail was galvanized. We had three cans of red spray paint and none of them would work. I found a blue spray paint and sprayed that. I found that it took all day to fully dry. That cause me to give up on trying a second puppy bouquet. 

Expecting the possibility of liquid sunshine, I set up in the smallest area I could under the awning. I had intended to lay everything out and photograph it, but did not have room on the folding table I chose to work with. I have two folding tables.  I used the smaller one.

I had three foam blocks to stick the flowers in. I cut one of the blocks in half.  I then trimmed the two half blocks on an angle to fit the pail. I stuck the pieces in the spaces on both sides. One was thick enough but the other was a bit too small. 

I started building the legs as I thought they should be using one of those “tuft”flowers where there are dozens of blossoms in cattail looking clump. I had some plastic fern and I cut sprigs off and stuck them between the legs. I kept working them so the sprigs would make a good separation between the legs. I then used medium white roses to build the head and body and I had some big roses or chrysanthemums for the muzzle and ears. 

My first attempt was bad. I was about to take pictures and bumped it and it started falling apart. I decided to take it all apart and do it over. 

I had various buttons to use for eyes but could not find them last week and could not find them today. I did have some googly eyes and decided to use the biggest ones of those. I decided the nose should be wood. I looked at some cuttings still sitting on the bandsaw and picked out a small piece and used my disk sander to rough shape it. Since the shape was acceptable, I took out a Stabilo and colored it black. 

I had cut a pair of chop sticks and a wood dowel to hold the eyes and nose. I cut the big end of the chop sticks on an angle and glue the eyes to them. I also cut the dowel on an angle and glued the nose to that. The eyes had to be higher than the nose so the chop sticks were longer. 

I tended to be in a hurry. I glued the nose and eyes on them and did not wait until the glue set to try to stick them into the puppy bouquet. The eyes mostly stayed on but the nose kept coming off.  Once I had everything the way I wanted them, I set it to the side and did not touch it.

I then spent a lot of time packing everything up. That was when I found the buttons I could not find. The ones I was going to use for eyes was too small. The button I was going to shape to make a nose was not as good as the wooden one was. I sorted everything. The cut flower garbage went into one bag. I kept the cut wire stems and put them in another place. Wires can be used for many things. I had everything packed away, then sat with Mom and talked. She loved the bouquet. 

Later in the day, I stopped at gave the flower bouquet to a friend. She first thought they were real flowers, then saw they were plastic, then backed up and saw the face. She instantly fell in love with it. 

In the evening, I looked up PUPPY BOUQUET images on line and saw that while I had results, the ones on line looked like real puppies. I then watched some videos on how to make them, and I made my a bit too complicated. There are two levels of the puppy bouquets. One looks like the dogs they represent. The others are mainly the head and feet and other flowers hide the rest of it. 

It would have been nice to have done the research before I started, but it was fun trying to figure it out. I will make another, but not for a little while.

I will see what I do tomorrow.

Year 21, Week 05, Day Two (week 1099) 

 (January 17, 2000 was my first carving day.)

02-14-21 Sunday

76 as the low, 84 as the high. Broken clouds early morning. The state took them back for repairs. Blue skies with wisps of clouds. Humidity in the mid 70s was helped some by a brisk breeze. Sometimes it still felt a bit stuffy.  They suggested morning showers and afternoon showers. None shown up. This weather report is brought to you by The City Of Pompano Beach Department Of Tourism. 


Over the years, I gifted or sold a bunch of wood turnings to my boss.   He moved to another house and could not keep a lot of it so I got a milk crate of my woodworking back. 

I had taken a plate I made and gave him, and sanded it really nice. Today I dug out the crate and sorted through the stuff. I found some of them just needed a cleaning sanding and revarnishing. Others needed some serious work. I picked out two apples and a bowl and decided to refinish them. The bowl is not something I made. I am sure, as the finish on it was nothing I would ever do. It was made of different boards stacked together. It just did not seem like something I had made. In that crate, there were a few other things I had not made. A couple I did not think I made until I picked out some clues on how they were made and were something I did. 

The finish on one apple was really bad, flaky and mottled. The other just had a bad finish. I sat with some 80 grit sand paper and started sanding. first around the equator, then around the curve of the top. Then the curve of the bottom, then worked into the centers. I used  power on a few places to get some hard to reach spots or some spots that would not sand properly. I cut off what remained of the stem and drilled that out. On the bottom is the remains of the flower. I had used a clove, which looks like the petal. Over time, it took a beating.  I have no clue where my craft cloves might be now, and I don’t have that spice in my kitchen. I might have asked mom for some of hers but did not think of it. 

I grabbed a piece of mahogany I had laying nearby and took an ax and a hammer and split a piece off. I then cut it into sections. I made stems for the top, using the dremmel and the knife. For the petal, I shaped it, using a sanding disk edge to cut three lines across the end. The ends and the stems would be glued in later.

On the bottom of the apples, I ground in the bumps that form on the bottom of the apples. One had six bumps, one ended up with four bumps. They were both supposed to have five. Using different grinding and sanding bits, along with hand sanding, I smoothed things out. I should have waited, but I glued the stem and bud in place and set the apples to the side. They are going to need to be sanded with much finer grit before I am done, and the bud and stem might be in the way in the finishing process. Both of these apples were made in mahogany. One was from two boards glued together. Thinking back, I may have been given some boards that were glued together and I used them for various projects as I am not good at gluing boards. 

I then tackled the bowl. I am thinking that it was stained as part of the finish. There was a red or pink tinge to the varnish. I have never used colored varnish nor have I ever used a stain. I like the wood to be natural as possible. 

On the inside, I used a one inch sanding disk to grind away the varnish on the inside bottom, and on the inside sides. This was a really course grit disk. I then went to a fiber disk and sanded the surfaces even more. Finally I hand sanded the inside, sometimes going back to the power to remove stubborn spots.

I then worked the outside.  I tried to do it mostly with hand sanding. The underside bottom needed power to clean that up. The finish looked thick. I used power on several spots on the outside but mostly sat and sanded with sandpaper. When I decided to end. The bowl was well sanded, but still needed more. There were a few spots where it looked like there was some scuffed finish still lingering. I will save that for next time. 


One piece I did not think I made, until I figured out how it was made, and I knew I made it. This is a turned piece with a drawer in it. At first, I could not figure out how to make the drawer. I think I had seen a club demonstration on how to make these and gave it a try.

What I had done was to cut the piece of wood into three parts. I think I roughed turned them first. The narrow middle I cut out the drawer. I think I used a scroll saw at that time. I likely used a dremel to hollow out the drawer. I then glued the pieces back in, locking the drawer in place somehow (or that part might have been finished turned already) and finished turning it. It was when I just barely saw the glue joint that I knew how I made it.

This would be a project to try again and see if it works the way I think I did. With greater skills, I can see other ways of doing it, but my description sounds about right.

I have loads of projects to work on. I will have to see what I dig into next time.

Will see what happens next weekend.

2005


One of the dish cloths I made. 
This is a skip stitch, where I would crochet three, then skip two, creating the holes. 
Mistakes happen. 
Since it is going to be used, I am not changing it.

Another dish cloth. three rows double crochet, a triple crochet in the middle then three rows of triple crochet. then I edged it. The shape is caused by a change in the stitch count as I was going on. this is going to be used so I don't care to change it. Being small, I will just make another one.

clerodendron tree in blossom.

All the branches you see there is one year's growth. 
We trimmed it to the trunk last year.
This tree started in the pot and went into the ground. 
One of just a few trees in mom's yard in the ground. everything else is in pots


This is another clerodendron. this one is in a pot. 
Because it is blossoming, it may well have gone into the ground.
after the blossoms die out, we will likely move it and cut any roots in the ground.

The side of my puppy bouquet

front side of  the puppy bouquet.

some pieces I thought I would refinish.
The three "banana bowls" were in the shed and I dug them out a while ago.

You can see the flaky finish on this wood apple.

another wood apple. the finish just needs retouching, but will be completely replaced.

the bowl I decided to sand down. the pink is not something I would do. 
The red finish is not something I would do either.

The apples after I sanded them with new stems added.
still needs finer sanding before they can be finished.

The bowl with the finish mostly gone. 
Needs more rough sanding before I start heading to finer sanding.


Wednesday, February 10, 2021

Year 21, Week 04, Day One (week 1098) 02-06-21 Saturday

  Year 21, Week 04, Day One (week 1098) 

 (January 17, 2000 was my first carving day.)

02-06-21 Saturday


72 degrees as the low 80 as the high. Sky ran from partly cloudy, to  overcast, and around three, we got some liquid sunshine. Mom does not have to water her plants for a day or two.  This weather report is brought to you by The City Of Pompano Beach Department Of Tourism. 


I started the day by sleeping in a whole lot. I stopped and talked with a friend, and when I got to Mom’s house, it was near lunch. After lunch, I laid down and took a nap. After I talked with mom, making two crochet hearts, I headed home to go take another nap.

Last week, I told a little bit about sandpaper. Since I did little today too, I thought I would talk about tool marks this time.

There is a skill to using tools properly. If you work it right, you almost don’t have to sand when you are done. Masters might only give it a light sanding to even out the surface and then turn to finishing.

An example of using the tools properly, For the table saw, carefully aligning the fence so it is parallel to the blade, using the blade with the right number of teeth for the job you are doing, and making sure your blade is sharp, all goes a long way to coming up with nice clean edges that almost don’t need sanding. There is also skill and muscle memory necessary when pushing the wood through the blade. Push it wrong and you will get twisting, uneven edges, burning, chipping. There is a right way to do it, but a lot of us either don’t work with it enough or don’t know about it.

With Wood turning, sharpening the tool just right, handling it rotated on the right angles to the center, with the right pressure and the right angle to the length of the lathe bed and the right angle up and down, along with sliding it along at the right speed, and you can create surfaces that don’t need to be sanded at all. 

I kid with  people by saying I woodwork like Godzilla. When I am done with the machinery, I need two grit sandpaper to knock down the tool marks. I will admit, that I am not quite that bad, but it is closer to the truth than it should be. 

The experts in our turning club will spend hours each day making projects, learning how to handle the tools how to sharpen them, how to move their body with the tool in the right position for the cleanest cuts. I likely spend one weekend a month at the lathe. 

There is a saying that says that if you spend 10,000 hours doing something, you can become a master. That is about 8 hours a day, five days a week, 50 weeks a year, for five years. I am not sure if I have that much time in either my wood carving or wood turning combined in my 20 years experience.

As I was saying, each tool you use has to be used properly to get the most effective work out of it. If it is done right, later work is kept to a minimum. To use the tools right, one generally have to develop muscle memory and build a knowledge of the tool to an instinctive level. You have to be able to be thinking about the results you are to get, rather than each step of using the tool. 


It is like writing a note. You don’t want to be thinking. “A ‘T’ has a down stroke, and then a stroke across it. Oh yes, across the top. The ‘H’ has a down stroke. Oh, Yes, two down strokes. There is something missing, Oh yes, a stroke in the middle. The ‘E’ has a down stroke. Now a stroke leaving the top. Another leaving the bottom then a stroke leaving the middle.”  “Ok I wrote THE. Now the next word.”    Instead, you want to have the letters and the spelling of the words in memory so you can just write your note. Thinking of the PROCESS is what you have to get beyond, so you can accomplish your task smoothly and effectively. Sometimes, getting past the process is the hard part. Developing an understanding and the muscle memory makes for quality results.


In wood working, which ever machine you are using, you should get to where you can concentrate on the end result, rather than the process. The touch typist has muscle memory, where the fingers know where to go to hit the right key the instant the person decides on that letter. The wood turner has the muscle memory where his arm and body knows how to move to get the effect he is after, which includes nice clean surfaces. The guy at the bandsaw will know how to set up the saw right, with the table at the right angle if necessary,  and turn the wood to get the curves he is after. The guy with the sander will know which sandpaper to use and how to move it on the surface to get exactly the effect he is after and know not to tip it on the wrong angle and whether to follow the grain or go across it. 

These are really true if you are using a handsaw, a chisel, a hand plane, a router, a dremel, or a drill. I cannot drill a straight and centered hole to save the universe. Other people could do it blindfolded. You develop muscle memory to do things exactly the way it has to be, without having to think about the process. All you have to think of is the results.

To develop the muscle memory needed, one has to do it often, and do it right each time. How you hold your hands, turn your body, place your feet, can make all the difference in the world in the final results. You come to that position automatically and you move just the right way and you have quality results. It all takes practice, all muscle memory.

One thing you must realize is while you are developing your skills, you are going to mess up often. Pounding a nail in sounds easy until you have to do it. Bent nails are common until you learn to hit it the right way. That takes muscle memory. That takes bending a lot of nails until you get it consistently right.

For me to get where I need to be in my wood working, I really need to spend hours a day every day working on projects. I don’t. It would be nice but I cannot. I do what I can with the time I have involved and the tools at hand. I tend to accept the results as is.


I will see what happens tomorrow.


Year 21, Week 04, Day Two (week 1098) 

 (January 17, 2000 was my first carving day.)

02-07-21 Sunday


72 degrees as the lowest temp during the night, 85 as the highest.  We had mostly bright, broken overcast, with some bits of blue showing. Some showers to the north and south of us, but while outside, was dry all day here. This weather report is brought to you by The City Of Pompano Beach Department Of Tourism. 

I thought I was starting late, but got onto the road a little early. After gassing up, I went to Harbor Freight for a worship service, I mean to shop. I got out of there at less than 30 bucks. That is good, as it could have been much more, for I hand my hands on a dozen other things and had to talk myself out of them.  I got a couple things I really could live without, but it was fun drooling, I mean looking for anything really interesting. 

One interesting thing I picked up was a saw-bit set. It comes with an arbor, and five different sized saw blades. They had two kinds of these saw sets. One had a shaft that would fit the dremel and the other had a shaft that would fit the drill. I almost bought both, but just got the dremel bit since that is my number one tool. The main drill I have is also a screw driver and does not get up very fast. I showed it to my brother and he said he might get that for at work. 

I stopped at Walmart and picked up a Ninja brand air fryer. I had gotten Mom a large one for Christmas and she loved it, so I decided to get a small one for me. Hopefully it will get some use later in the week. 

My Christmas tree is still up. I took my copies of the ornaments down and put them away, before I my new Valentine’s day ornaments. I had the painted little hearts with a red background an a white center. I also have the Camphor hearts with pink around the edges and bare wood in the center. I have a few crocheted hearts and am adding more as time goes on. I also stopped at the dollar store and picked up some pink and white paper doily hearts, some necklaces with heart shaped beads on them. Them, with the red bows that came with the tree, made it fairly good looking. After Valentine’s day, the ornaments will come down and the tree will be tossed on Garbage day. It has seen better days (I got it used) and next year I will replace it with a new one.

With my ornaments off the tree, I counted them, photographed them and then packed them away. I have 73 ornament designs that I have made over the years. There are a few repeats, but even 70 ornament designs is pretty good for 20 years of wood working. 

There are a few I might try making again. I made some three legged stools, and some buckets. I might make more of them.  I do have a couple left in the briefcase I take them to work in, but I know I can do better. One year I made some lady bugs and some mice on the lathe. They might be kind of fun to make also. I might expand on my designs to other critters. 

When I got to Mom’s house, I was not really in the mood to do much work, though I had a lot I could do. I set up the table with all my stuff, then sat and sanded on the little tea pot I had added varnish to last week. There were a number of things that needed correction. I had glue on the wood near the handle where it slid a little while aligning it. I used a little drum sanding disk on the dremel and ground the varnish, then the worst of the glue away. There were a few other spots that needed “horsepower” to correct. 

Then I sat and sanded with 400 grit sandpaper, using some 100 grit for a few spots that showed up as I was sanding. Like I had mentioned last week, you are supposed to sand until all ridges and divots are gone. The problem with this tea pot was that some of it is the natural surface. I folded the sand paper at a few spots to get the corner into the deeper areas so that when I was done nearly the whole surface was sanded. Some areas needed more work than others, but since I was not in the mood to do much, I sat and sanded. I wiped it clean with a cloth and gave it another coat of varnish. It now has a nice gloss. I should sand and varnish it a couple more times, but this week, it made a nice improvement.  When you spray varnish something, you get little nibs on the surface. A light sanding cleans the surface so the next coat is smoother. 

I noticed I have another piece of wood with a branch that is similar to what my tea pot was before I started. I am thinking I might take what I learned from this tea pot and make another one with all new mistakes. Will have to see.

At work, I broke the handle of a cheap pair of scissors. I picked up a cheap replacement, quicker than having one ordered. I got the idea of replacing the plastic handle with wood. I was reminded of something very important. Those cheep scissors and cheap kitchen knives are made of good stainless steel. I tried drilling a hole in the piece the handle goes on but instead I only put a pock mark in it, and burned up two drill bits and dulled a third. That was not going to work. I then got an idea. I will make knives of the blades. They might not be spectacular knives, but they would be interesting to make. I used a grinding bit to grind down the rivet holding it together. I had to punch the rivet out of the hole. 

One half is fairly straight to the handle. That will be easy to make into a knife. The other one, the handle is at a strong angle. I can make that into a knife but there won’t be as much metal going inside the handle, unless I grind some of the blade back also. 

My favorite way to make knives is to have them taper from the back to the edge in a single angle. These might have a second angle right at the edge. I will decide that once I start making them. I might do the angled handle one first so that if I mess up royally, the other one can be done right. There is also a slight bend to the side of the blades so there is a constant pressure against them as they cut from back to tip. I will likely simply bend them the other way at the time. 

I had made handles for some cheap steak knives and that was a challenge as the drill bits would not go through the metal either. I won’t be trying to drill these for anything. I will use a tight fit and strong glue to hold the handles on.

Thinking on it, I will grind the cutting edge flat, then shape the blades properly. That will allow me to make them properly. 

Beyond that, I made a crochet heart while talking to my brother about videos we saw. It was nice when we saw the same ones. We could remind each other of details within the show. 

I really need to get some projects done next week. 

I will see what I accomplish next week.

2497


animals

people and lighthouses

things and critters

other objects

valentine's tree

dish cloth I crocheted and gave to mom. 
lots of errors but still pretty

dish cloth I finished before I posted this. 
I have a problem on keeping the rows counted even. 
this went from 20 stitches at the start, to the right, down to 15 stitches on the left.


Friday, February 5, 2021

Year 21, Week 03, Day one (week 1097) 01-30-21 Saturday

  Year 21, Week 03, Day one (week 1097) 

 (January 17, 2000 was my first carving day.)

01-30-21 Saturday


Temps starting with a 59 low and rising to  77 high. Partly and mostly cloudy, but there was some sun, especially around noon. This weather report is brought to you by The City Of Pompano Beach Department Of Tourism. 


I went to a memorial for an acquaintance of mine, but a good friend of my mother. The friend passed late last year from cancer. We saw some people I have met many times. It is surprising how people are easily recognizable even with a mask on. Gives a lie to bank robbers not being known because of a mask....

Because of the memorial, and having to do some computer work, I accomplished nothing in woodworking today. 

Last week I mentioned that every tool does damage to your work. Sometimes the damage is what you want. Other times it is not. A year or two ago, I told about sandpaper. I thought I would explain about it a bit differently this time. 

When you are making something, nicks, dings, scrapes, ripples from tools cover your surface. You need to remove them to give you the surface you are after. That is where Sandpaper comes in. Scrapers can be used on flat projects, but ones with curves are difficult for a piece of metal to match the curve, so sandpaper is needed.


When they make sandpaper, the sieve it through different meshes. Each mesh is classified by the number of lines per inch. 30 grit sand paper is 30 lines of mesh to the inch. 240 grit sand paper is 240 lines of mesh to the inch. Grit that cannot go through one mesh is given the grit rating of that grit. Anything that goes through is given the rating of the next mesh grit. 

Different manufacturers use different thickness of mesh lines, and also the mesh count of their meshes come at different spacing. One might have 80, 100, 120, 200, while another might have 60, 80, 150, 250.  There are different glue compounds to the sandpaper. Sandpaper for sanding metal have a weak glue because the edges of the stones wear out quickly so they are knocked off and the next layer starts their cutting, or they are super hard and glued in place, though some metals are even harder than that.  Sandpaper for wood and plastics have a stronger glue, though each manufacturer has their own glue recipe. Sandpaper for power tools have glue where it encases the grit so that it will last a long time. It would be miserable to have to change a sanding belt after ten minutes of use because the grit wore off. 

Now back to the surface damage. The way sandpaper works, is you use the coarsest sandpaper that the damage will require. If there are deep marks, you might need 40 grit, but most people start at 80 or even 100.  

The grit of the sandpaper scores the surface. The object is to get the surface covered with the scores of the sandpaper and nothing else, which means scraping down to the lowest damage that has to be removed. When the surface is evenly scored, with no high or low points, then you go to the next grit of sandpaper. The key is to make sure the entire surface is fully sanded with that grit so all you see is the scores the sandpaper makes. Get rid of those divots and scores. They will look worse and worse as you go to higher grit sandpaper and are harder to remove then.  

As I was saying, with the next sandpaper, you grind the surface until all the marks from the previous sandpaper is gone. Because the scores are smaller, it won’t look as bad. Then you do the next grit of sandpaper, and you keep doing it until the surface is smooth enough for whatever finish you want to do. 

I hear some cabinet workers go to 150, furniture makers might go to 350. Many wood turners won’t stop until they are at 400 or 600 (usually varnish won’t stick to surfaces sanded to higher grits). With some really hard woods, you might sand up to 12000 grit or higher and have a varnish-like polish to the surface from the wood itself. You sand to whatever level you decide is enough. The key is to remove all scores from the previous sand paper so everything is even. Many times I’ve had to destroy a fine surface to remove mistakes missed by previous grits due to my laziness.  

Power sanding will fix really bad mistakes, or large areas of flat. One of my problems I’ve seen with using power is that I don’t always hold the sanding surface even to the surface of my work, especially on a curved surface so I end up with divots or scrapes and such that have to be removed with even more sanding. It is great when fixing really bad mistakes or tool marks but there are limits. Many times I didn’t realize I had flaws (from lazy sanding) until I give the work a coat of varnish. The varnish hardens the wood and the varnish coat has to fully cure before correcting the errors in order not to have to toss a bunch of sheets of sandpaper because the varnish gummed them up. 

Sanding takes patience and time, and that tends to be something I don’t have a lot of. 

I will see what I do tomorrow.


Year 21, Week 03, Day Two (week 1097) 

 (January 17, 2000 was my first carving day.)

01-31-21 Sunday


Temps starting with a 69 low and rising to  77 high. Lots of feather clouds and pulled cotton in the sky, but the whole day was sunny, so they were not stopping the sun. We are expecting mid to high 40s for part of this week. Slip and slide time on the highways. I may have to dodge the glacier that comes from our highest natural point. I will not be able to try to drive over the great ice sheet to the Bahamas this week. I have some projects most of the week.  This weather report is brought to you by The City Of Pompano Beach Department Of Tourism. 


I sat and sanded my little tea pot for at least an hour, then gave it several shots of varnish. Of course, when you do that, all sorts of errors show up.  I have some spots where the glue was on the surface.  There are some places that needed more sanding. I kept giving it coats of varnish and will leave it at that, at least until the varnish cures enough, likely next weekend. 

To fix mess up and then fix the tea pot, I dug into a bin I have that has mahogany and other kinds of wood. I took some pieces out with the idea of making use of them. I started measuring a piece of mahogany to make a little saucer out of it. Using a triangle square, I ran lines off the corners to find the cent. At the edges of the wood, the lines were not in line. I used the square to check the edges. I had placed the triangle on the long sides of the block and ran to the corner. Well, I found out that the two sides were not parallel. I then used plan two. I measured the width of the wood and measured that dimension up both sides of the block and drew a line between the two points. That line made it square. 


Then I got an idea of something more important. 

Last week I broke a lathe dog. I decided I would try to make a new one. At first I was going to make it out of wood for practice of the steps to create the design, then I decided to look in my chowder box, which is what the machinists call the box that holds bits and pieces of materials for projects. I have some steel the right size, but did not feel ready to try machining steel. I decided to use a piece of aluminum instead. The part that goes into the hole of the face plate won’t be as long as the original, but I decided it would still work when done. 

I didn’t have a hack saw at hand, so I could not simply cut the excess material off to get the rough shape, which is the easiest and fastest. Instead, I decided to try machining the material off. If nothing else, I would gain experience. Of course, I did learn a lot. The piece of aluminum was cut off of some casting I was given by my brother. He had melted some aluminum and stuck them in a container so I ended up with a block. This was later cut off of it. I don’t remember why. The top was not flat. And that complicated holding the piece in place without it moving. Any movement can ruin the work when you get to the final dimensions. 

I was working with a number of problems as I was starting out, because the piece kept moving. What I ended up doing, was to use a hold down on top locking it against the work plate, while setting it to match the angle it could hang onto. I then set the other hold down right along side the bottom of the block, synched down, to keep the block from sliding as the cutting bit dug into it from the other side. That worked. 

Most wood working tools will work on aluminum. I could have used the bandsaw to remove the excess material, but that is hard on the band saw blade. I would rather not have to change that blade any time soon. The bandsaw needs mountains of work and I am not quite up to getting it to where it needs to be. I would replace it with a high quality, accurate bandsaw, but this one works well enough. Nothing I am doing right now needs to be THAT accurate. 

I started with one bit and it was fighting me a little. I took that off and grabbed a drum style bit with loads of spiral teeth running down it. My brother later told me that this was a woodworking bit. It worked fairly well, though my chuck would let it slip once in a while as the spiral would pull it down. I only machined about half an inch, but I got some good experience on machining. The big key to machining is learning how to hold a piece, how much a particular bit will cut, and how to clean up. While most of the metal stayed on the lathe, I had little bits on my shirt and my pants. They don’t brush off easily. Hopefully the wash will deal with them....

Next time I work with the lathe in the milling configuration like I did today, I will be able to set up faster and be able to work sooner. Like I said, I had decided I was going to get some experience in milling and machining. From what I understand, steel will require a lot shallower and slower cuts than what I am doing. Of course, I would do better cutting less metal each time anyway, though it would take longer. 

My brother suggested that I test every cutting bit I have and see how they handle the metal and how they work. Some may work better than others. I should also check to see if I change the configuration of the pulleys, speeding the spin rate up or slowing it down, whether it would improve the cutting of the bits. This experimenting would teach me a lot of what I am doing.


Later in the afternoon, long after I cleaned up, I dug out a brand new Harbor Freight diamond stone set (the three plates has the grits of, 180, 250 and 360 grits) Along with a bunch of my chef’s knives and a leather strop mounted on a wooden handle, and sharpened them. I also sharpened Mom’s favorite chef’s knife. They are sharper. At home last week, I needed to cut up some meat and realized I was not happy how sharp most of the knives were. I took what I felt was among the sharpest of them this time and used it to julienne some pork skin from a cooked pork roast I bought. I cut some earlier in the week and struggled. This time the knife handled it nicely. I need to sharpen the others a little more.  In carving and in the kitchen, sharp knives cut the subject, dull knives cut fingers. The comparison between the two cutting sessions proved the point to me. 

I have worked on the crochet hearts this week. I found I have to stitch two together for them to be really useable or even good looking. That means that I have five hearts made, rather than a dozen (a couple came apart). It takes longer but looks better. Like everything else I do, I am a bit sloppy at this. Mainly I need to just take my time and concentrate on doing everything right, rather than trying to get them done. Typical for me. I am the kind of person that the closer the start and the finish is on a project, the better I like it. 


Next week I have a lot of projects to work on. The crochet might be done during the week. I do have the puppy bouquet to do and I would like that done by Valentine’s day. If I have enough material, I might make two. I don’t have the bucket but something else might work. I will have to see. I likely won’t do more machining unless I find a blank spot in my projects. I also doubt if I will make that mahogany platter I was laying out for and leave that wood for something else. I have loads of projects that won’t be a one weekend thing, and therefore likely won’t be done. Other projects, like making center rests for my two lathes look like distant future projects. 

I will have to see what I do next weekend.

2403


this is the set up I was using for machining the piece of aluminum.
I added notes to the picture for clarity

little tea pot from the back

little tea pot from the front

The mango tree in the area are in blossom.

close up of the blossoms.
Usually only a fraction of the blossoms create fruit.